I'm an old Film Photographer, with emphasis on the 'old'.
I also have an Online Store, '
The Film Bloke' - catering to the needs of Film Shooters and Darkroom workers.
This article is for people interested in developing their first film.
First of all let me say I'm not "the" expert in this field and I'm not going to teach you how to make 'fine art' quality negs and prints, (because I don't know how), but I have been doing this for many years and it's not as complicated as you may be led to believe by stories on the Internet. (That's Irony).
Everyone has their own idea about how to do things (including me) and it leads to confusion if you are new at it. Ask a thousand photographers how to shoot and process film, and you'll get a thousand different answers.
My aim is to tell you how to make a decent garden variety negative and avoid common mistakes. There is a summary at the end of the article of do's and don'ts.
If you are just starting out with film, the rule of thumb is K.I.S.S.
Throughout the article, the film I'm referring to will be 35mm and black and white unless otherwise stated.
To start, shoot one type of film, use one type of developer/stop bath/fixer and one technique. The idea is to reduce as many variables as possible, and if something goes wrong, it's much easier to troubleshoot. You can get adventurous later once you have the basics nailed.
Shooting:
Meter your shot as usual, if in doubt, over expose rather than underexpose, film handles highlights well and you will have a less grainy shot.
Unloading the Camera:
When the roll of film is finished, press the release button usually under the camera and start to wind the film back into the cassette in a clockwise direction. Do this slowly and feel for a sudden 'release' and the re-winding will become easier. At this point stop winding, open the back in subdued light and remove the film leaving the leader sticking out of the cassette by 2-3 cms.
Leaving the leader stick out will make the next step much easier.
Loading film onto a developing tank reel:
This part requires practice in daylight on an old roll, or use an "
Easy Load Reel" that I sell in my store and also use myself for Medium Format Film like 120.
For this step you will need:
Film Change Bag or a Darkroom
Bottle opener,
Pair of small scissors
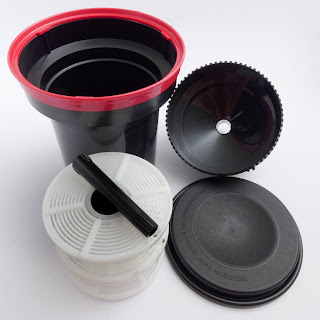
Developing Tank and Reel(s)
Some patience.
For those of you without any basic gear, I sell a ready to go
B&W developing Starter Kit in my The Film Bloke Store, complete with chemicals.
I started to write the instructions for loading the reel, but it's much easier to watch a youtube video.

This
video shows this happening in a darkroom, but the procedure is the same for a change bag.
Once the film is loaded and the developing tank is closed up and light-tight, remove the tank from the change bag and over to the developing area, usually known as the 'wet area'.
Prepare your chemical stock solutions:
Many developers, stop baths, fixers come in a concentrated solution and need to be mixed with water at a certain ratio to make what is called a 'stock' solution - some do not.
Often this 'stock' solution is further diluted with water to make your 'working' solutions, especially in the case of many developers like Kodak D76 or Ilford ID11.
The working solutions are what you will use to process your films. Read the instruction sheets with your chemicals carefully to determine how they are used, they are not all the same.
The chemicals in general are fairly safe, as long as you don't bathe in, or drink them. Just use common sense and keep it off your skin as much as possible and work in a ventilated area.
For the development step you will need:
3 Jugs with a 600ml capacity, and with graduations and labelled 'developer', 'stop bath', 'fixer'
1 Funnel
1 Thermometer, needs to be accurate within half a degree or so.
1 Timer capable of minutes/seconds (smart phone is good).
Developer of choice.
Stop bath of choice.
Fixer of choice.
Wetting agent.
Squeegee or new soft damp sponge.
Note for chemicals:
Developer temperature is important, the temperature of the rest of the liquids including the wash water should be within a few degrees of the developer temperature, or else you may end up with what's called '
reticulation' in your negative (a bunch of cracks in the emulsion). You can also do this on purpose for effect if you want.
For developer, I'm going to suggest a 'one shot' type like Rodinal, Adonal or R09 which simply means it's not re-used, and it has a huge shelf life, years in fact and is very economical.
Mix your Rodinal or any other Developer with water at 20 degrees C, usual ratio is 1+25 or 1+50.
Check the
development time for your film/developer combination and set your timer for that time. In this case, the time for 1+25 is 9 minutes at 20C.
(You can use the above 'development time' link for any combination of film/developer, just type the details in the top left corner of the page).
Line up your three jugs on the bench from left to right
in the order of Developer>Stop Bath>fixer. Add the chemicals to these jugs,
make sure temperature for developer is 20 degrees C and the rest of the chemicals within a few degrees of that.
Develop!
Add the developer to the Developing tank, pouring
slowly into your tank, holding the tank at an angle toward the jug to minimise splashing and creating bubbles.
Tap the tank bottom on the bench a couple of times to dislodge air bubbles (there won't be any if you poured the dev in slowly).
Then agitate the tank gently by inverting or 'twiddling' the agitation stick
slowly for 5 seconds/per minute of developing time. I find 'twiddling more convenient than inversion.
(
I rinse with water between steps to reduce carry-over of chemicals from one step to the next, it isn't necessary, but helps preserve the life of the stop bath and fixer and only takes a few more seconds. What can I say? I'm a tight arse.).
Stop Bath:
When there is about 15 seconds to go with dev time, tip your developer down the sink or into a receptacle, run some tap water in the tank and swirl to wash out any remaining developer, drain and add the stop bath. Agitate gently for 30 seconds, pour back into your stop bath bottle or jug for reuse.
(Many stop baths have an 'indicator' and change colour when exhausted).
Fixer:
Run water into the tank again for a minute, swirl and drain, add the fixer and Agitate as for developing, but for the
time indicated for fresh fixer, usually around 5-6 minutes. Pour used fixer back into the bottle for re-use.
A thing to note with fixers is that even though they are reusable, their effect weakens with use and a '
clearing test' needs to be done to determine the correct fixing time. Neither under or over fixing is a good idea, they will both affect the quality or preservation of the negative.
Final Wash:
After the fixer has been poured back into it's jug or bottle, remove the lid of the developing tank and start running tap water into the tank at a slow but steady stream for around 10 minutes. At the end of that time, turn off the water and put about 3-4 drops of wetting agent into the tank.
(don't use household detergents, they have fragrances and other additives that may damage your negs).
Gently 'twiddle' the loaded film reels in the wetted water, try not to excessively foam the water up.
(Wetting agent helps film to dry evenly and reduce the chances of water marks from minerals in the water)
Drying the Negatives:
Remove a film reel from the tank, shake off excess water by 'flicking' it into the sink. Twist the two sides of the reel in opposite directions while holding the reel horizontally.
Lift off the top half of the reel and grab the outer end of the film, being careful not to touch the emulsion or image area with your fingers.
I find it easiest to grab the film by the edges between thumb and forefinger somewhere near the middle and hang it in a inverted 'U' shape. Grab the
clean squeegee or sponge, dip it in the tank of wetted water, shake or squeeze out excess water and with a single stroke, squeegee one half of the film, then repeat on the other hanging half.
(Some people will advise you to avoid squeegees like the plague, saying that they scratch the film. My contention is that they will only scratch the film if they have crap on them - keep your tools clean and you will never have a problem. It is best to get the film dry as soon as possible by squeegeeing away the excess moisture, because once dust gets embedded in the soft emulsion, you will never remove it.)
Attach a weighted
film clip to one end, and a normal clip at the other, I sell them in sets in my Store The weighted clip should be at the bottom to encourage the film to dry without curling.
Now to hang your films in a dust free environment to dry.
I found the best place to dry them is in the bathroom inside the shower recess, just put a rod across the top of the stall and a bit of wire or something to make a hook and close the shower recess door.
Under normal circumstances 2-3 hours is long enough to dry the film, but longer on cold wet days.
Obviously try and choose a time when the shower recess isn't likely to be used.
 Storage and Archiving:
Once your film is dry, it's time to put them in
negative sleeves. The acid free acetate ones are convenient because they are transparent, but they aren't as well suited for keeping your negs in a pristine state.
A paper based material known as
Glassine is far better, because it will absorb dampness in the environment and thereby discourage the growth of mold.
Normally the negs are cut into lengths of 5 or 6 frames, depending on what sleeves you have.
Do not handle the negs with your fingers on the image area, they are virtually impossible to remove from the emulsion due to acid and oils in your skin and will ruin your image.
Use either cotton gloves, or become adept at handling them only by the edges.
Summary of do's and don'ts when shooting and processing film.
Don't tell your Wife/Partner/Significant other that you are converting the Bathroom into a Darkroom - They will punch you in the face. Ask them nicely.
Do Load and unload film in your camera in subdued light or at least not in bright sunlight.
Do not store your camera or film in a hot car in summer, the film will object strongly.
Do try and leave the film leader sticking out of the roll at the end of your shoot.
Darkroom means Dark!
If you have prepared a room as a darkroom, spend at least 5 minutes in it in total darkness to check for light tightness, and you will be amazed at how bright it becomes in there.
Do load exposed film onto your reels either in the above darkroom or a film change bag in subdued light. In a pinch I have loaded films onto reels in a normally dark bedroom, under about 3 or 4 heavy blankets.
Do be clean, consistent and accurate in your time, agitations, temperatures and measurements when processing.
Do clean and dry all your gear and store in a dust free place until next use. Experiment by all means, but try to change only one variable at a time in your work, it will be much easier to trouble shoot if things go belly up.
Do not handle film with your fingers in the image area, a guaranteed way to kill your negatives.
Do invest in a
Giottos Rocket Blaster or a
Hurricane Canless Air System - Dust and hair is the enemy of film (unless you like spending hours spotting). I have not had to spot a single neg since I bought mine.
Now that you've done that, he next step is to either make wet prints the traditional way, print by using an inkjet printer or just digitise them for the Web.
Much more fun to be had yet.....

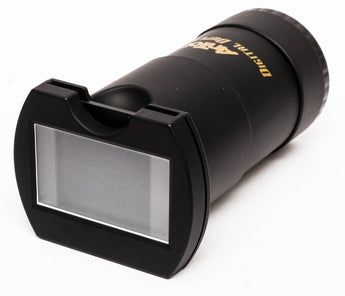
 As expected there was
softness in the corners of the digitised negs, the centre was
acceptable for a budget copier, and overall the outcome was ok to
post online or make moderate size prints from, probably no bigger
than 8x10. I think the results were superior to the el-cheapo 5mp
copiers that proliferate ebay, they don't have the benefit of a good
DSLR sensor and a Macro lens.


